Posts: 553
Threads: 32
Likes Received: 816 in 362 posts
Likes Given: 197
Joined: Dec 2020
Location burnley UK
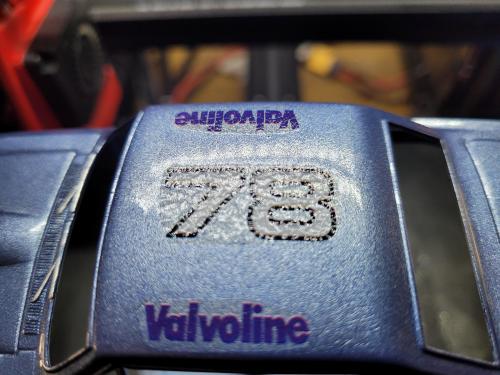
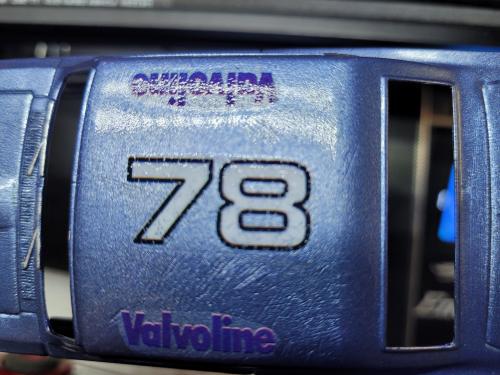
WHY ?!?!?!?!?!?!?!?!
this is after 1 light coat of laquer .... is there a fix?
Kev
![[+]](https://slotracer.online/community/images/bootbb/collapse_collapsed.png) •
•
Posts: 3,215
Threads: 84
Likes Received: 4,781 in 2,085 posts
Likes Given: 565
Joined: Nov 2020
Location Nottingham
What lacquer were you using ?
I use Johnson Klear floor tile lacquer which seems to be safe for most decals.
•
Posts: 553
Threads: 32
Likes Received: 816 in 362 posts
Likes Given: 197
Joined: Dec 2020
Location burnley UK
Holts auto spray clear lacquer L101C
It seems to only effect certain decals
think they may be cheap since the seem very thick
the others i used were original Airfix and are un-affected
will get some of what you suggest and see how it goes
or buy better decals
Kev
•
Posts: 388
Threads: 43
Likes Received: 957 in 299 posts
Likes Given: 1
Joined: Aug 2019
Location Toronto, Canada
Hello Kev,.... a couple of questions/comments.........
How long did you allow the decal to dry ??...if a larger size decal is not fully dry (a couple of days) even a light coat of lacquer can react with the moisture under the decal and cause this bubbling effect.
Some lacquers are "hot" and will cause this effect if applied too heavily.....while you did indicate you applied a light coat, I find a few initial "mist" coats (30 mins. in between) do the trick. I now only use Tamiya spray lacquers (as Hot as they get) and have never had an issue using multiple mist coats with 30 mins in between.
While Future/Pledge is an acrylic and will not attack/ruin decals, and is cheap, and easy to apply,...it is far from robust, and therefore not the best choice for slot car bodies.
It is however a good barrier,...and a coat on top of your decals before applying lacquer is a good safeguard.
As far as fixing what you have........you can apply a few coats of Future or Some Tamiya clear acrylic (not lacquer) ,...lightly sand and re-apply/re sand until smooth.
Cheers
Chris Walker
Posts: 2,054
Threads: 131
Likes Received: 3,410 in 1,389 posts
Likes Given: 3,125
Joined: Sep 2020
Location A small igloo in Canada
Nice save, Kev.
Drive faster, keep it in motion, and no one will see any flaws.

Posts: 388
Threads: 43
Likes Received: 957 in 299 posts
Likes Given: 1
Joined: Aug 2019
Location Toronto, Canada
(26th-Nov-21, 03:00 PM)OXO cube Wrote: (25th-Nov-21, 10:37 PM)chrisguyw Wrote: 'How long did you allow the decal to dry ??'
decal was applied over 2 days before hand , but did apply 'micro sol' approx 1 hr before lacquer thinking it would form a kind of seal
'you did indicate you applied a light coat'
crinkling effect occurred after 2nd light coat
'While Future/Pledge is an acrylic It is however a good barrier,...and a coat on top of your decals before applying lacquer is a good safeguard.'
this is a good tip and will be employing in future
'As far as fixing what you have...lightly sand and re-apply/re sand until smooth.'
this has been the solution used
not perfect by any means ... but 100% better
note to self .... use finer wet & dry if this occurs again 
Cheers
Chris Walker
thankyou Chris
Kev
Hi Kev,...the only potential issue noted above is applying micro-sol an hour before applying you lacquer............any moisture on or under the decal, may well have reacted with the lacquer, causing bubbling.......let everything dry for 48 hours,.......and try to apply 3 or 4 mist coats of clear before attempting any wet coats.......patience

Cheers
Chris Walker
PS If you are trying to get a perfect finish, Tamiya makes a range of polishing compounds (coarse, fine, finish) that work extremely well.
Posts: 553
Threads: 32
Likes Received: 816 in 362 posts
Likes Given: 197
Joined: Dec 2020
Location burnley UK
Class C Pontiac GTO ready
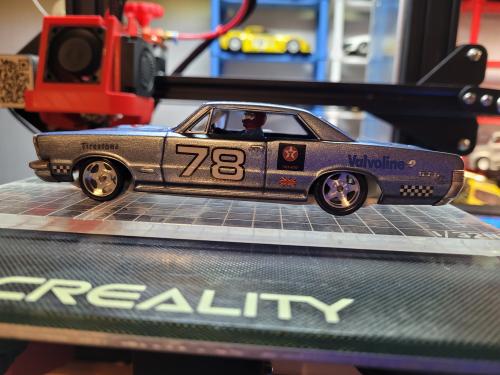
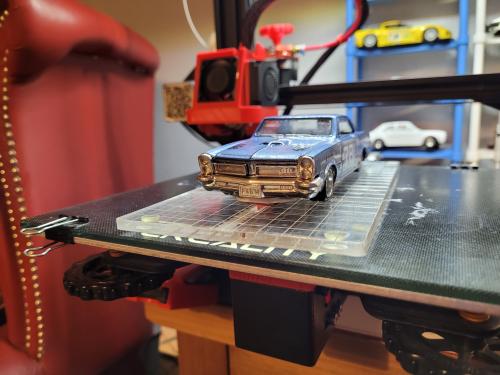
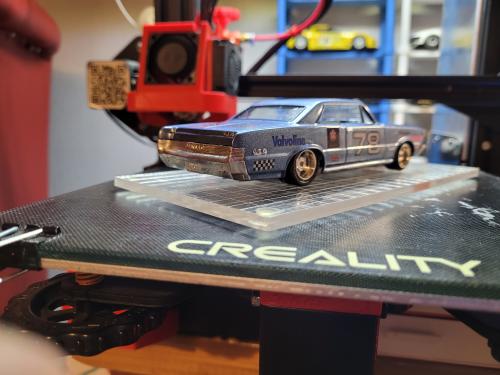
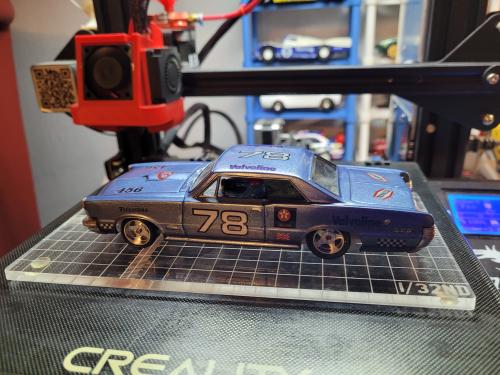
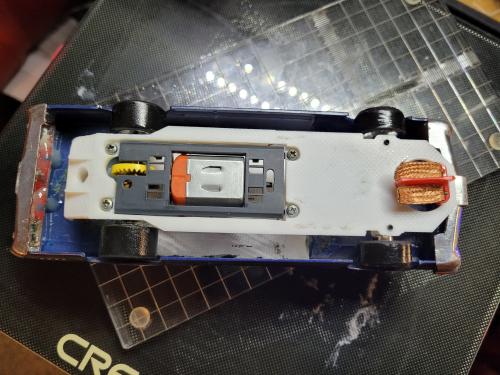
turned out not bad imo
just need to tweek for balast
Kev
then its onto the Class A entry

Posts: 2,054
Threads: 131
Likes Received: 3,410 in 1,389 posts
Likes Given: 3,125
Joined: Sep 2020
Location A small igloo in Canada
Looks great, Kev!
Super nice looking wheels too.
•
Posts: 573
Threads: 9
Likes Received: 569 in 284 posts
Likes Given: 727
Joined: Mar 2021
Nice Pontiac!!!! I love it.
•