29th-Dec-20, 01:57 AM
Now that the main chassis holes are done. Flip the part 90 degrees and start the process of locating the center of the bearing marks using the pilot drill.
Same theory applies for the bearing holes. Don't move the part until all three machining processes are completed. Start with the pilot drill. Then move up to drill bit #14. Then use the reamer to remove the last 0.005" of an inch for super precise accuracy. The bearings/bushings fit like a glove using a reamer.
Keeping things locked tight is important during this step. You need to use the pilot drill for the top hole only. Then carefully plunge the #14 drill bit through both sides of the tubing.
This is just before reaming both holes.

This is the reamer after removing 0.005" of an inch from the pre-drilled holes. Barely a few small aluminum hairs left on the reamer. Both holes are perfect and in line.

Now we need to remove the excess material from the top of the chassis. Whether you use aluminum channel or tubing makes no difference in the fact that you still need to use the bandsaw to remove the excess material to get the motor to fit. The difference being, square aluminum tubing is much more square than the aluminum channel. You end up with a much better product using square tubing. Aluminum channel is also a pain to hold in the vise.
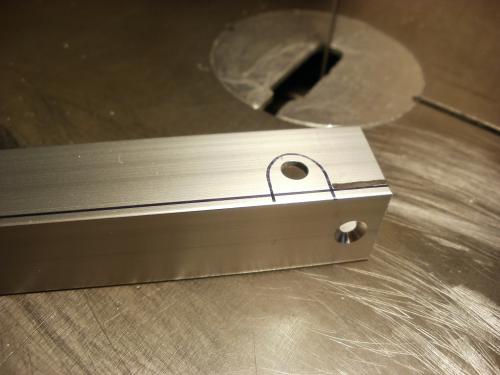
I mark the side of the chassis with a thin marker. I use a popsicle stick to mark where the bearings are located. Pretty fancy eh?

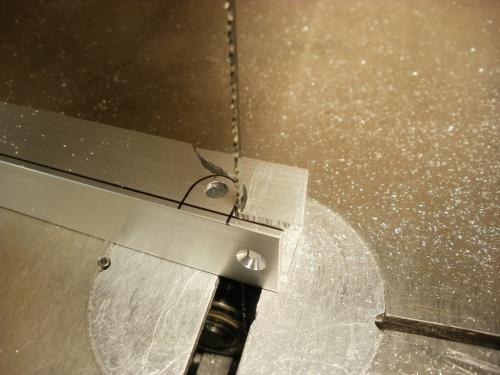
Time to start cutting. I found there is a way to cut the chassis while also keeping the bandsaw blade as far from fingers as possible. I like my fingers. A lot!
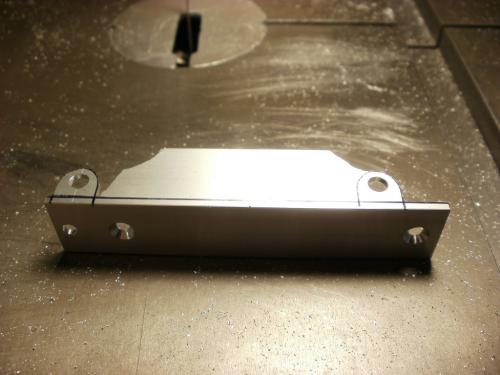
This is the pattern.


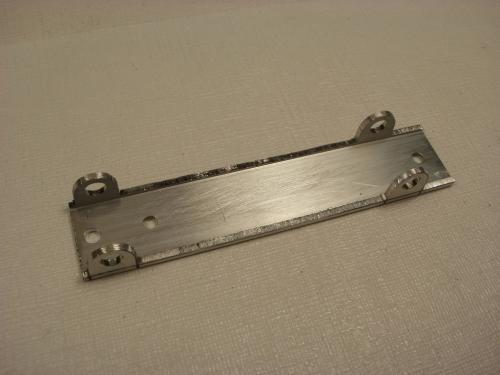
Now the hardest parts are over. It's time for the details.
Same theory applies for the bearing holes. Don't move the part until all three machining processes are completed. Start with the pilot drill. Then move up to drill bit #14. Then use the reamer to remove the last 0.005" of an inch for super precise accuracy. The bearings/bushings fit like a glove using a reamer.
Keeping things locked tight is important during this step. You need to use the pilot drill for the top hole only. Then carefully plunge the #14 drill bit through both sides of the tubing.
This is just before reaming both holes.
This is the reamer after removing 0.005" of an inch from the pre-drilled holes. Barely a few small aluminum hairs left on the reamer. Both holes are perfect and in line.
Now we need to remove the excess material from the top of the chassis. Whether you use aluminum channel or tubing makes no difference in the fact that you still need to use the bandsaw to remove the excess material to get the motor to fit. The difference being, square aluminum tubing is much more square than the aluminum channel. You end up with a much better product using square tubing. Aluminum channel is also a pain to hold in the vise.
I mark the side of the chassis with a thin marker. I use a popsicle stick to mark where the bearings are located. Pretty fancy eh?
Time to start cutting. I found there is a way to cut the chassis while also keeping the bandsaw blade as far from fingers as possible. I like my fingers. A lot!
This is the pattern.
Now the hardest parts are over. It's time for the details.

![[+]](https://slotracer.online/community/images/bootbb/collapse_collapsed.png)