29th-Dec-20, 01:27 AM
I generally use 3/32" axles, and 3/16" OD single flange bearings. (or Oilite bushings)
Slot.It univeral guide part number CH10.
4-40 brass inserts with #227 Evergreen styrene tubing.
4-40 countersunk screws and washers. (90 degrees)
The tools required.
#2 pilot or center drill (before every hole).
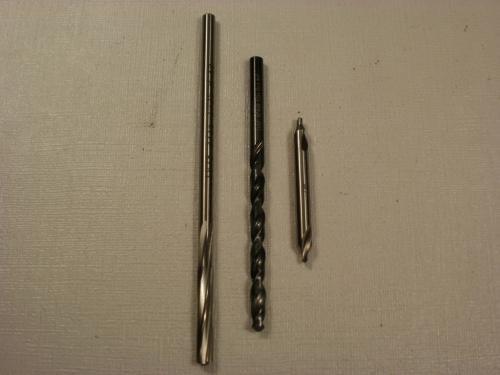
Guide hole = Number 27 drill bit (and pilot drill).

Body post holes = 1/8" drill bit and 1/2" countersink (90 degrees)(and pilot drill).
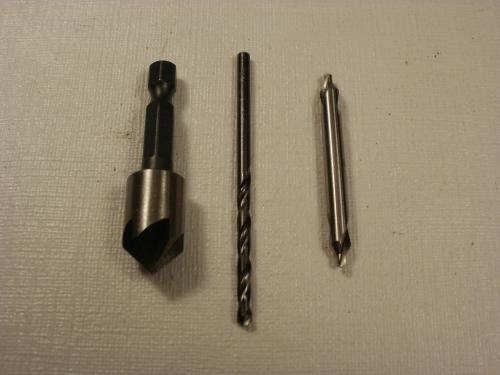
Bearing saddles = Number 14 drill bit and a 3/16 reamer (and pilot drill).
Now you can take a short cut and just start free-hand drilling. But the likelyhood of the axles being aligned would require a bit of luck. I found a very cool tool that allows me to move the part while keep the axles in line with each other during the machining process. It's called an XY-compound table made by Proxxon out of Japan. It gets bolted/fixed to the drill press.
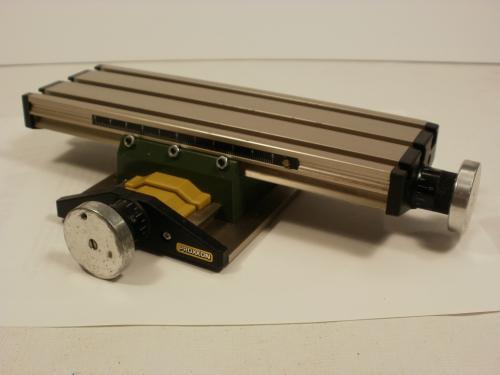
My first several cars were made by clamping the tubing to the compound table. A bit crude. But functional.


I eventually located a larger drill press that would accept a precision vise mounted to the compound table. Clamping the tubing just became much easier and quicker.

No matter what equipment you use. The machining process is the basically same.
The pilot drill is interesting in that it's very small in diameter. The large shank supporting it won't allow it to bend or wander. It's used to gently "spot" where the hole is located before commiting to drill. If you are a bit off center from the mark. Only a pilot drill can be corrected for position. All other drill bits will wander back to the original spot.
I started with the body posts first.
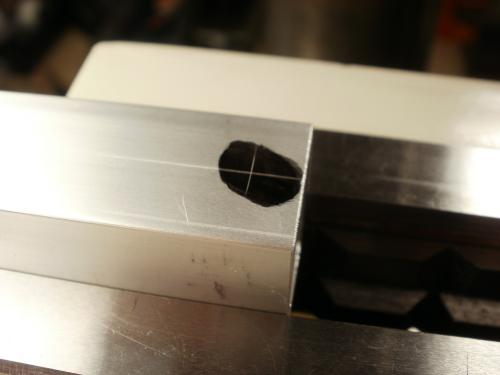


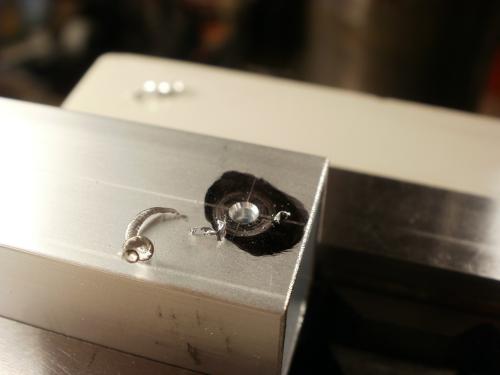


I test to see how deep the screw sits before moving to the next hole and do the same process. The part does not get moved until all three machining processes are completed. Only then can you move to the next hole, or the centering is thrown off.

The guide hole is easy. Pilot hole first, then the #27 drill bit.
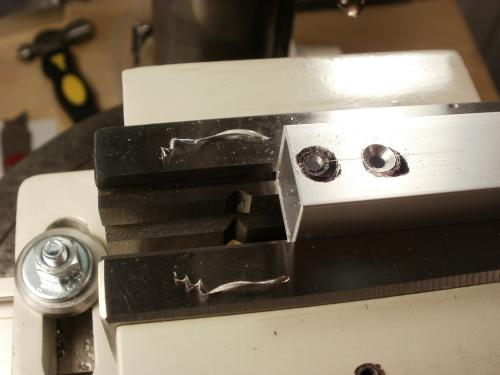
Bearing/bushing holes are next.
Slot.It univeral guide part number CH10.
4-40 brass inserts with #227 Evergreen styrene tubing.
4-40 countersunk screws and washers. (90 degrees)
The tools required.
#2 pilot or center drill (before every hole).
Guide hole = Number 27 drill bit (and pilot drill).
Body post holes = 1/8" drill bit and 1/2" countersink (90 degrees)(and pilot drill).
Bearing saddles = Number 14 drill bit and a 3/16 reamer (and pilot drill).
Now you can take a short cut and just start free-hand drilling. But the likelyhood of the axles being aligned would require a bit of luck. I found a very cool tool that allows me to move the part while keep the axles in line with each other during the machining process. It's called an XY-compound table made by Proxxon out of Japan. It gets bolted/fixed to the drill press.
My first several cars were made by clamping the tubing to the compound table. A bit crude. But functional.
I eventually located a larger drill press that would accept a precision vise mounted to the compound table. Clamping the tubing just became much easier and quicker.
No matter what equipment you use. The machining process is the basically same.
The pilot drill is interesting in that it's very small in diameter. The large shank supporting it won't allow it to bend or wander. It's used to gently "spot" where the hole is located before commiting to drill. If you are a bit off center from the mark. Only a pilot drill can be corrected for position. All other drill bits will wander back to the original spot.
I started with the body posts first.
I test to see how deep the screw sits before moving to the next hole and do the same process. The part does not get moved until all three machining processes are completed. Only then can you move to the next hole, or the centering is thrown off.
The guide hole is easy. Pilot hole first, then the #27 drill bit.
Bearing/bushing holes are next.

![[+]](https://slotracer.online/community/images/bootbb/collapse_collapsed.png)