


-
What is this worth...SCX ...
Forum: 1:32 Scale
Last Post: Gpa113 -
SlotForge Timing - (Track...
Forum: Race Control
Last Post: theDutchmanJames -
What cars have you built ...
Forum: 3DP
Last Post: JMay -
One of my favs!
Forum: 1:32 Scale
Last Post: fotodoug2 -
NSCC Leatherhead Swapmeet...
Forum: Events
Last Post: Gpa113
- Forum posts: 48,463
- Forum threads: 5,012
- Members: 1,694
- Latest member: DutchKing 66
Upcoming Events
WHO Autumn Stages - Today
WHO Nascar - 4th-Nov-26
NSCC Leatherhead Swapmeet - 8th-Nov-26 ( - {4})
WHO Tin Top Saturday - 14th-Nov-26
WHO Test & Fun Night - 18th-Nov-26
WHO F1 - 2nd-Dec-26
WHO Tin Top Saturday - 12th-Dec-26
Swindon Swapmeet - 10th-Jan-27

early December 2019 being laid up due to arthritis in a bad injury from my youth
i decided to have a mess with my sons Scalextric
this quickly turned into a bit of an obsession
and i hoped to begin attending my local club track ( pendle )
then covid hit
since then after scouring the net , i have yet to find a comprehensive guide to controllers
i understand there are many different types with many extras
i dont think i am alone
in the hope that someone in the know
will one day explain these mysterious things
in terms that a complete novice can understand ( myself )
or point us noobs in the direction of a concise 101
fingers crossed
kev

Hi
I'm looking for ideas on how to make and fit a wheelie bar to the rear of micro scalextric car. Any idea welcome.
Cheers.

This is my basic tyre-truer. There's nothing very original about the concept - it's just my personal take on it.
It is ideal for truing rubber and urethane tyres on the rear axle of cars that don't have removable alloy wheels. And perfectly adequate for cars that do have alloy wheels. Plus it's very cheap. The big downside is that you're using the car's motor to drive the tyres on the sandpaper - if you take care, that won't over-stress the motor, but it will take extra time and patience.
It is a significant step up from truing on the track...
For starters, you don't need three hands - and the results are much better.
How I made it
My DIY tyre truer is made from a scrap piece of Scalextric track that I’ve cut in half lengthways and then hack-sawed out a slice...
At the front, I have soldered wires to each rail on the track and screwed the other ends to terminals (brass bolts), which are attached by crocodile clips to my old Maplins bench power supply. I set the power supply to 12 volts. At the other end of the track piece, I have a square of 6mm-thick mdf sheet that has sandpaper glued to each side – 400 grit on one side and 600 grit on the other. This gives a lovely flat sanding block. The base is a 25 x 12 cm piece of mdf, each end braced by a piece of white PVC angle...
It wasn’t a difficult job and I had all the kit and materials lying around. To avoid the soldering and need for a power supply, you can use a Scalextric powerbase, power supply and controller – the C8545 powerbase can be picked up new for less than £5. The plastic and metal connectors will need to be cut from one end to allow the sanding block to sit snuggly. You can slice the track in half length-ways if you want to. You’ll need both hands to concentrate on the car, so either wrap a rubber band around the controller trigger to give permanent full power - or remove the controller from the plug and connect the two wires on the plug.
How it works
First a word of warning... I don’t recommend sanding tyres (or wheels) when a digital chip is fitted in the car. The added friction of the sandpaper requires more power to go through the chip to the motor. This risks damaging the C7005 retro-fit chip, the C8516 F1 digital plug and older versions of the C8515 standard digital plug. The latest version of the C8515 plug and the Slot.it SP15B chip are both designed to handle more power, but I would still urge caution. It is always advisable to remove a chip before any tyre sanding or truing.
The process of tyre truing is straightforward, but requires patience and care. Sanding too hard and too quick risks damaging the car’s motor, melting rubber tyres and messing up the sanding block.
The first step is to sand the plastic wheels, which may have lumps and bumps from the manufacturing process that will cause the tyres to be out of shape too. I remove the body from the car and then remove the tyres. I placed the car on the truing track so the motor and wheels spin, holding them up and away from the sandpaper. With the tyres removed, it’s important to be careful of the gears – especially with a sidewinder car – you really don’t want to sand down the gear! I move the sanding block to one side, so the wheel comes down on the edge of the block and the rest of the axle is suspended in mid air...
I slowly lower the wheel so it is just touching the sandpaper – the coarser 400 grit is best for this. You don’t want to push the wheel down. Let the sandpaper gently do its work for five seconds – a count of “1,000 – 2,000 – 3,000 – 4,000 – 5,000” – and then lift up. After a break of at least five seconds, I lower the wheel for another five seconds of sanding. I repeated this process a few times until the centre of the wheel looks nice and smooth and any moulding imperfections have been sanded away. Then do the other wheel in the same way – moving the sanding block across. Each wheel took about two minutes of gentle, methodical sanding.
Now it’s time to true the tyres. I replaced them on my nicely-trued wheels and placed the car back on the truing track, the tyres held above the sanding block...
Using the 400 grit paper, I went through the same process as the wheels – gently lower onto the sandpaper, letting the grit do its job for a count of “1,000 – 2,000 – 3,000 – 4,000 – 5,000” and then lift and rest. The tyres grip the sandpaper much more than the plastic wheels, and the back of the car will shudder and rattle – it is important to hold the car steady with both hands, but without pushing down.
On Scalextric cars that have the motor in-line, you will see the motor flex in the chassis when you true the tyres. The pinion gear will climb up the crown gear, adding to the rattling noise. This isn’t good. It shows what happens under harsh acceleration on track – the movement and the poor mesh is a waste of energy that could be powering the car. It's a fine example of why the motor should be glued in. It'll also expose any slightly loose wheels! Better to sort them out now than lose performance at the races.
The aim of the truing process and repeated five-second sandings is to produce a tyre surface that is perfectly flat and a circumference that is perfectly round. In practice, I am looking at a tyre surface that is smooth and has no shiny spots left – or perhaps just a narrow ring on each edge. That still gives a rounded ‘shoulder’ on the edges, which is important. A completely square edge can increase the car’s tendency to tip over. You can create a more rounded shoulder by spinning the wheels at 12 volts and sanding with an emery board.
The tyre truing process took me just over ten minutes for the Mustang shown here. Tyre residue did build up on the sandpaper and I brushed it away from time to time with a soft brush from my tool kit. And there was plenty of muck that came off the tyres when I cleaned them on masking tape. There'll also be tyre dust in the back half of the chassis and - if you do it with the body on - there'll be the underside of the body to clean out too...
On the track, truing standard rubber tyres on the Mustang reduced lap times from 4.63 seconds to 4.28 seconds (7.5%) and made it easier to drive harder into and out of the corners.
Of course, if you plan to reduce the diameter of the tyres significantly, this will take a lot more time and patience. Although it's not possible to use this rig to true the front tyres on the front wheels, you could swap the tyres onto the rear wheels to true them. Alternatively, drive the opposite front wheel with a Dremel and rubber sanding drum, while lowering the other tyre onto the sanding block. That is a bit of a palaver and it's much easier to buy low-profile zero grip front tyres!

MSV circuits are selling tickets for some 2021 events, including BTCC. Whether the events take place is in the lap of the gods but there will almost certainly only be limited attendance allowed in the early part of the year. I would suggest booking early if you want to guarantee places. There is zero financial risk as MSV offer a no quibble covid refund policy.
Goodwood also started selling F.O.S. and Revival tickets today which will be in very short supply as 90% of last year's ticket holders opted to roll them over to 2021. Saturday only and 3 day passes are nearly sold out for the Revival already.

Can't seem to find any in the shops...does anyone out there have one they are looking to sell?
Thanks.
Any idea why I always get two notifications of all your messages on FB, one headed Slotracer and the other Slotracer.online?

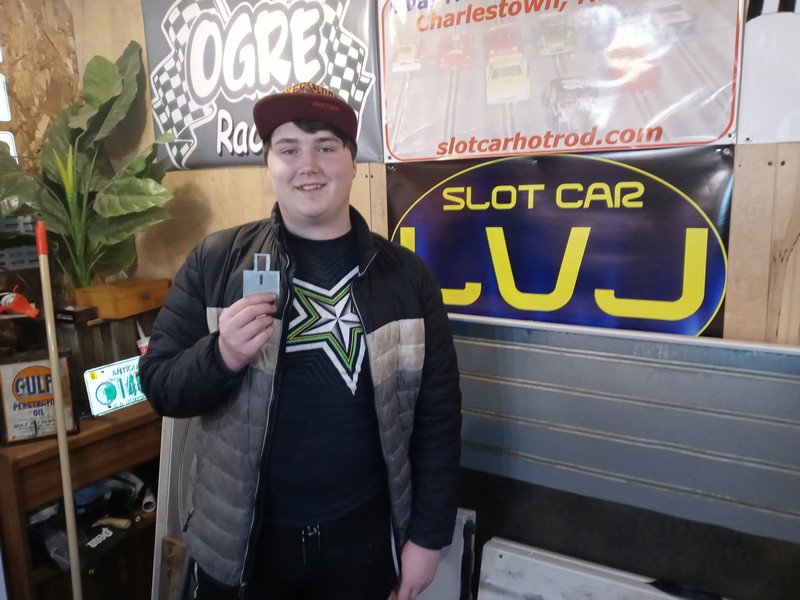
Due to COVID-19, occupancy is limited and new racers must call first to be approved. Call 603-826-4242 for details. Racing is free, as are the hot dogs. Here are this week's winners. Next race is February 7.



Hi all, Recently joined SlotRacer Online and would like to say how much help it has been in helping me get my Scalextric set up to the next level. Thanks to the advice on here Ive upgraded to Truspeed adjustable controllers running through the standard Scalextric power base but connected with 2 transformers and I can now appreciate why magnet free racing is so popular! Ive now got a serious slot car addiction but on the plus side my teenager son is getting hooked too, and seems to have claimed ownership of a couple of my better performing cars. If that's not a good excuse to get another car I don't know what is.
Thanks again to everyone on the site sharing your knowledge especially as I live a long way from the nearest club.
Best Regards Paul.
Another racing project I have called time on...
What we have here is an unboxed NSR 1024 Ford MkIV 1967 "Presentation Car" + NSR 1343 Ford MkIV Clear Body Kit + Pattos Place waterslide decals for the Denny Hulme / Lloyd Ruby #4 MkIV that raced at the 1967 Le Mans 24 hours. The decals and body kit would make this car...
I photographed the car at the Simeone Collection in Philadelphia in October 2018 and bought the NSR model, body and decals about a year later. The car has had some laps.
Cost: £45 including UK postage. Overseas postage at cost.

Has anybody got any experience of the above. There is one scene in the Italian job (Mini's go up onto the Palavela , the Turin Ice rink roof) , that however way I've tried is going to be impossible to replicate with the faller track, so I was considering if it could be done by routing, absolutely no idea how to achieve this, so thought I would seek advice.