


-
Magazines
Forum: Publications
Last Post: ePilot -
Model Painting defects
Forum: What Grinds Your Gears
Last Post: Kevan -
What is this worth...SCX ...
Forum: 1:32 Scale
Last Post: Gpa113 -
SlotForge Timing - (Track...
Forum: Race Control
Last Post: theDutchmanJames -
What cars have you built ...
Forum: 3DP
Last Post: JMay
- Forum posts: 48,466
- Forum threads: 5,013
- Members: 1,694
- Latest member: DutchKing 66
Upcoming Events
WHO Autumn Stages - Today
WHO Nascar - 4th-Nov-26
NSCC Leatherhead Swapmeet - 8th-Nov-26 ( - {4})
WHO Tin Top Saturday - 14th-Nov-26
WHO Test & Fun Night - 18th-Nov-26
WHO F1 - 2nd-Dec-26
WHO Tin Top Saturday - 12th-Dec-26
Swindon Swapmeet - 10th-Jan-27
I am in the early stages of planning a permanent circuit, it is based upon Suzuka and I have it nicely worked out in Scalextric track sections.
My question is weather to build in hard routed track or from Scalextric track sections? I am capable of building the hard track but what are the benefits?
I quite like the magnet racing and the history of Scalextric as I first drove Scalextric in 1970, however I have also done 1/32 scale hard track racing at Netley and Bournemouth.
Any comments are very welcome.
Barrie


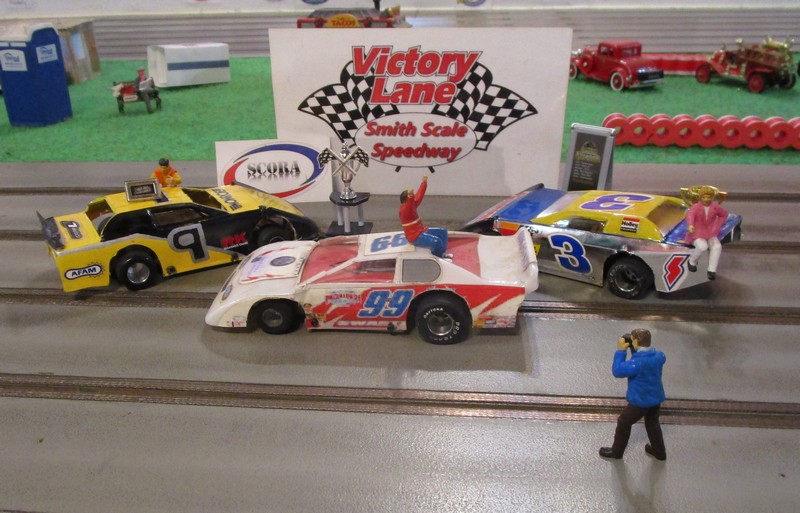
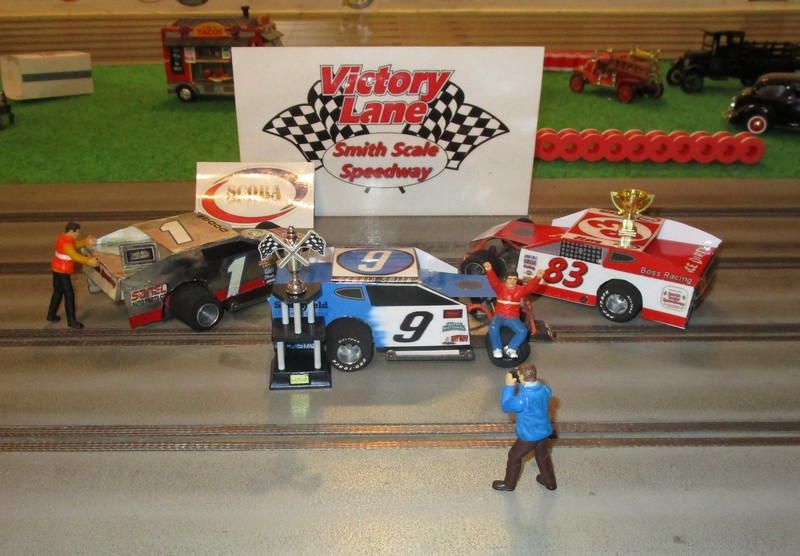
After a few years, the Dirt Modifieds are back, and we are running Dirt Late Models for the first time. Due to COVID-19, occupancy is limited and new racers must call first to make arrangements for attending. Call 603-826-4242 for details. Racing is free, as are the hot dogs. Here are this week's winners. Next race is May 2.
GUNK Dirt Late Models
GUNK Dirt Modifieds
Krud Kutter Sprint Cars
Red Devil Stock Cars



Hi guys, I'm after some help and advice on some parts.
I'm currently trying to restore some old cars.
I know it's easier probably buying a complete car, but I want to complete all parts of my bits and pieces cars.
I'm starting with a vintage C169 Cosworth Monroe (in yellow).
I have the body part number L6730
Floor pan L7213.
I'm looking for part numbers for the windscreen and the drivers cockpit.
The wheels, tyres motors questions to follow.
Once built this car will be racing hopefully more competitively than when it was first built.
Thanks for your help in advance.
Its been a while between posts for me not for any other reason than I have been researching everything track building, and accumulating the necessary tools (and other not so necessary tools but I just wanted them LOL).
After one dismal failure which I then turned into a testing ideas and just going through the motions to get my techniques right (then it became scrap to use for other tracks sides and base supports), I embarked on my first "real" track. I still made some errors, which have actually turned into really interesting features and give the track some real character.
My mate Murray who actually inspired me to get back into slot cars some years ago saw my made track and decided he wanted one for his nephew Tom. Tom is in his 30's but has a learning disability, and he and his mother, Murray's sister figured it may be a good way for him and his friends to have fun where the pool table hasn't really excited them.
So I said I would build it with Murray, he's a carpenter by trade, I work in IT and finance, but I have worked with tools all my life, my maternal grandfather being a cabinet maker (old school), and father a fitter and turner. So I can swing a tool and will give anything a go once.
I don't have a lot of photos of the work in progress, though Murray did take plenty of Tom's to update his sister. Murray was blown away at how methodical and exacting I was and how quickly it comes together, he is a very meticulous tradie, so it is a big compliment. For this I thank my grandfather (RIP), who gave me two golden rules, "measure twice, cut once", and "a job well held, is a job half done". Additionally I thank all the people on the slot forums who posted stuff about track building of which I think I read nearly everything. All up it has taken us four full days to get Tom's track finished, over the course of a 2 week period. Mine will be a work in progress as I decide to add more things to it.
If you look at the photo album my track is the one indoors, Tom's is under the pergola presently, we are taking it to him this Friday for his birthday.
So what did I learn?
1. Sometimes no matter how many times you measure you will screw it up, some routers just cannot do small radial cuts as you can see on my track.
2. On my track I decided to cut the inner line first so I could get the outer line tracking inwards, instead I got some very interesting lines that actually make driving it a great challenge. It looks weird but it is actually quite fun.
3. I decided cutting my turns first, then joining them with them with straights made it easier with my track design, especially as my track has very few straight sections. A straight edge carefully clamped made this very simple to run a router along and get a good cut between the turns.
4. Laying copper tape by hand is hard, but satisfying, the copper tape tool in its current design just didn’t do it for me.
5. Lay the copper tape first over the hole where the power supply will be, then plunge the brass bolt through it for best conduction, then lay another strip over the brass bolt for a clean look. Trying to get copper tape to stick effectively to the top of the brass bolt is just hopeless.
6. A 3D printer is invaluable. I was quoted a stupid price to get the copper tape tool printed. By the time I wanted to get a whole load of other stuff printed (control tower, figurines, barriers, etc..), buying the printer and materials was actually cheaper. I also now have a side gig printing custom bike parts, so the printer is now deductible to my business, big win. I can also print spare slot car parts, another win there. Plus the copper tape tool didn’t work so paying to print it and then not working would have really stung.
7. I also used the 3D printer to make a new base for my router with plunge holes for cutting the second rail, doing small radial turns, or attaching right angle aluminium for larger radius turns.
8. Designing in 3D is actually quite easy and free. Between Tinkercad.com and Thingiverse.com, there are literally millions of designs you can either print, or modify to suit your own requirements, or simply inspire you to create something from scatch. I designed a new copper tape tool which I hope to try on my next track. If it works as I think it should, I will release it for anyone to use.
9. Driving on a non magnetic track is so much more fun. I actually added builders loam to the last paint batch after blue taping the copper and it gives the road surface a very realistic feel, the cars drift well but also grip well. Some cars suffer from axle tramp and bounce under acceleration.
Overall, I am hooked on track building and already planning my next track, possibly a two level wooden track. But I want to finish my track with some more details before I start the next one. Then I may build some just to sell, not for massive profit, just to cover costs and enjoy the fun of building it.
This is a link to the google album. I got POV video of both tracks by printing a trailer, with wheels and axle, plus a camera cradle, then towed it behind a Scalextric Goodwood Beetle (only car with a bumper bar LOL). Its pretty awesome being able to think of something, design it, then make it, and use it.
https://photos.app.goo.gl/8W9JDqhvif8rsjSR7

Our village pub has just been awarded "dining pub of the year" by Luxlife magazine. Apart from the fact that this magazine sprays awards around like confetti I find it hard to comprehend how they managed this as the pub has been shut for virtually the whole of 2020! It is a very good local and the food is excellent but hardly Michelin star standard.
This nonsense is getting out of hand, the world and his mother have an award scheme. I don't think I have ever been to a chip shop or Indian restaurant that wasn't 'award winning'. I am sure it is some sort of scam where they pay for their award by some organisation nobody has heard of.

Shapeways are offering free shipping on orders over $99 until April 23. Promo code: FREESHIP21
For those of use who dabble with 3D printed chassis and parts in any scale, we know Shapeways print quality is unsurpassed but the shipping costs are a bit of a downer. A free shipping offer is always very welcome.
Of the traders here, Amato and Olifer offer printing via Shapeways - and there are also dozens of other slot car stores and products to look at.
I haven't grabbed anything from Shapeways since Brexit... the European printing is done in Holland, so VAT may be an issue - depending on where the packages enter the mail system.
Here's the small print...
Quote: *Promo code FREESHIP21 is good for free shipping using Standard or the least expensive shipping option. Order must meet a minimum of $99 USD per order before taxes and VAT. Order must be placed during the offer period. If you order a design during the promotion period that cannot be printed or is rejected for any reason, we cannot apply the discount to future orders (even if the original designs are repaired and reordered). Code cannot be combined with other discounts or offer codes. No cash value. Discount does not apply to past purchases. Eligible with economy or priority manufacturing. Code is active starting April 15, 2021 at 8:00 p.m. Eastern Daylight Time and expires April 23, 2021 at 3:00 a.m. Eastern Daylight Time. Shapeways reserves the right to terminate this promotion at any time prior to April 23, 2021.
Slot.it SP44 Universal Lighting Kit with brake for Analogue and Digital Slot.it. Available now £18.25
For users of the oXigen Type C Chip, this is what you've been waiting for - a lighting kit that is compatible with the little ribbon connector on the chip. The board will also work with analogue cars and is compatible with the following Slot.it digital chips: SP15b, SP15c, SP43, O201b2 and O201c.
The module supports two white front LEDs (more can be added by connecting extra LEDs in parallel - as long as they are of the same type), two rear red LEDs with braking (digital and analogue) and two auxiliary LED lines. On analogue cars, the +12V and GND terminals are simply connected to the pickup wires. Used with a Slot.it digital chip, the board must be connected via the cables included in the kit.
There are some new features for this version of the Universal Lighting Kit...
As before, when using the O201b2 chip or O201c chip with oXigen firmware, the lights can be switched on and off via the SCP controller. When a car stops on track the auxiliary LEDs will now flash (only if the lights are switched on) and if the car leaves the track, all the lights will start flashing after 3 seconds (whether lights are turned on or off).
Using the new lighting kit with the O201c chip with Scalextric SSD or Carrera D132 firmware also provides the flashing mode when a car leaves the track, but there's no flashing when the car stops on the track. The new SP43 Carrera D132 compatible chip works with the SP44 lighting kit to give all the features (on/off, flashing when stopped on track, flashing off track). It is unclear whether the updated SP15C SSD chip will do the same. The SP15B does not, although I presume there is flashing when the car leaves the track.
Used with an analogue car, lights stay on only when the capacitor is charged. When an analogue car deslots, all the lights start flashing after about 3 seconds. As with the digital chips, flashing frequency is reduced after about 20 seconds. The brightening of the brake lights may be slightly delayed if the speed of the analogue car is high.
Included in the kit are:
- 1 PCB board
- 2 white LEDs
- 2 red LEDs -
- red and black wires
- heat shrinking tubes
- 6 pole ribbon cable (O201c 'Type C' chip)
- 3 pole JST cable (SP15b, SP15c, SP43 and O201b2)
- Instructions
The kit is available now at Pendle Slot Racing here.
Me again! I am in love w/the Slot.it "gulf" Lola Aston Martin DBR1-2
What are the possibilities that it could be chipped to run on a Carrera Digital track?
If yes, is there a specific chip that will work?
https://slot.it/ca31...in-dbr1-2-2009/
Thanks!
Steve
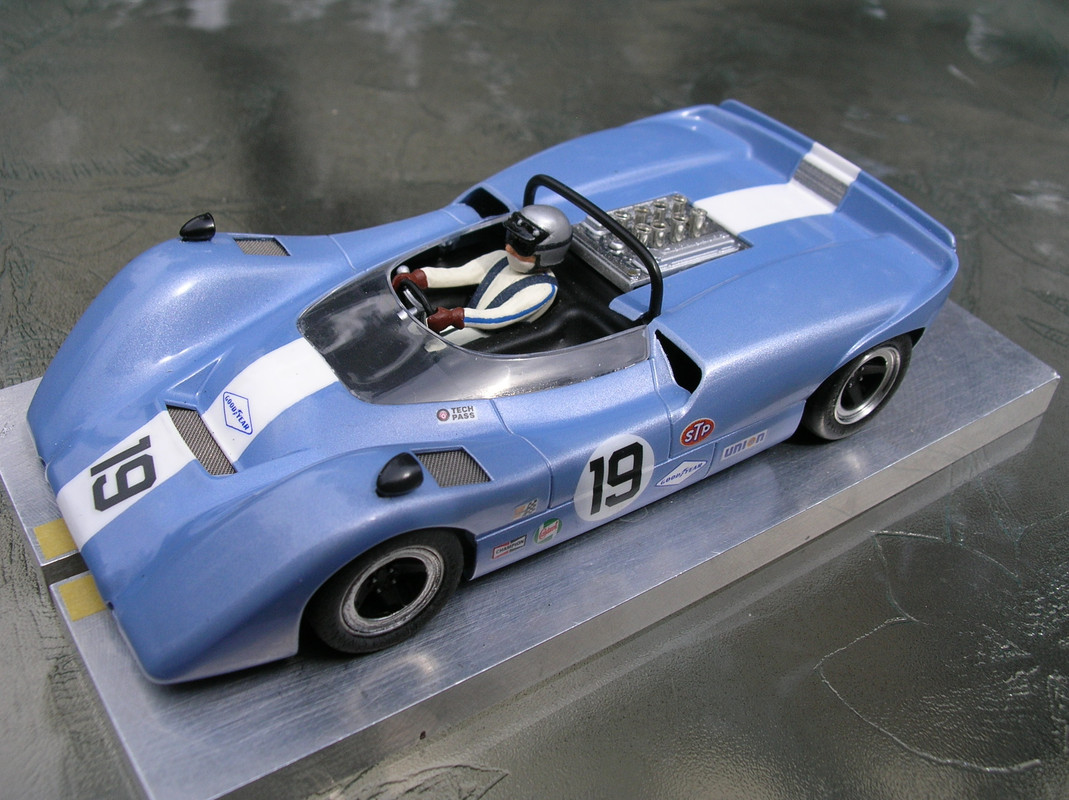
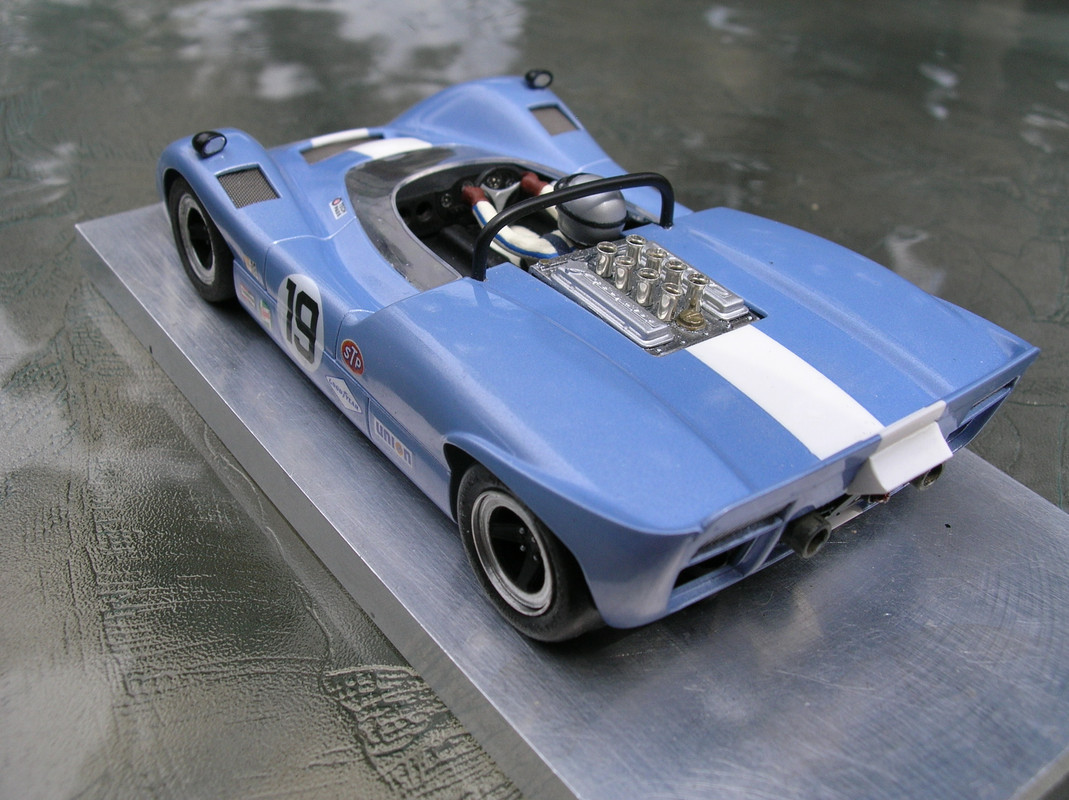
This car has been built for an upcoming CanAm proxy (1966/1974), and it looks like there will be entries from a few countries.
While I do normally prefer to scratchbuild a chassis time constraints this year (coupled with my own laziness),..I have built a couple of TSlot chassis'. One will be sent to a fellow club member, but, as they are virtually identical in performance, I have not decided which one I will enter.
The first is an anglewinder, with an NSR 22K, silicone damped pod/body mount, rear axle brace, MRSlotcar gearing, and NSR Ultras.
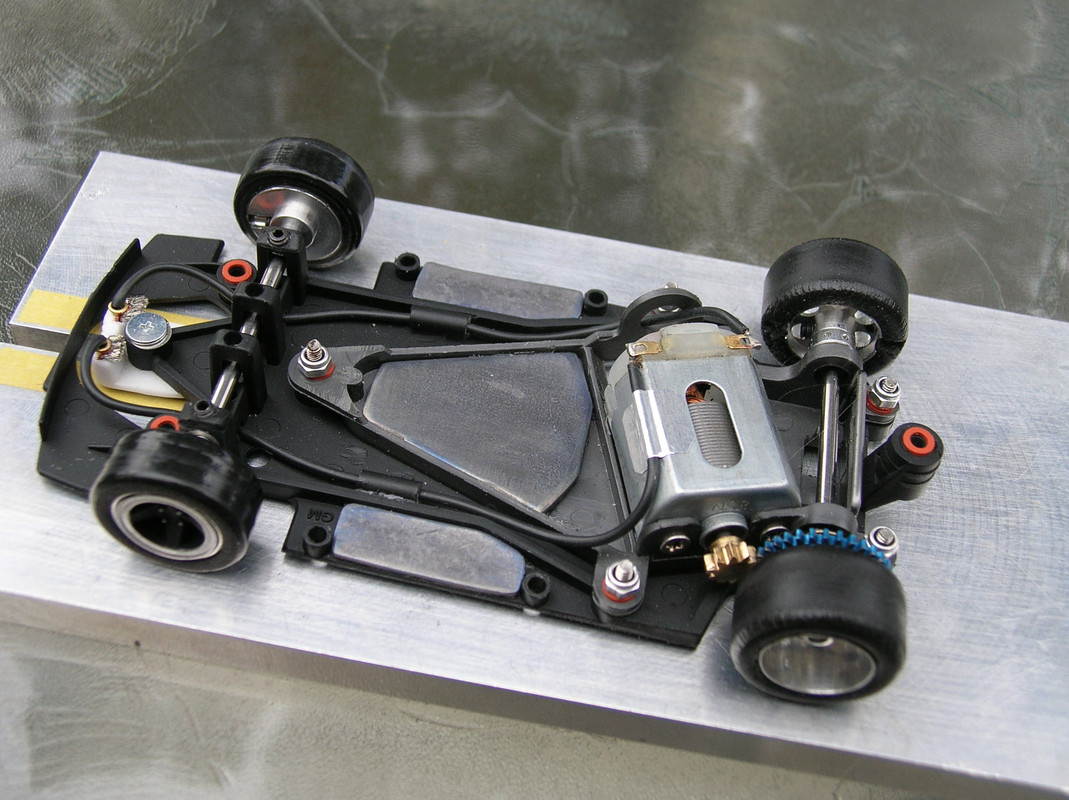
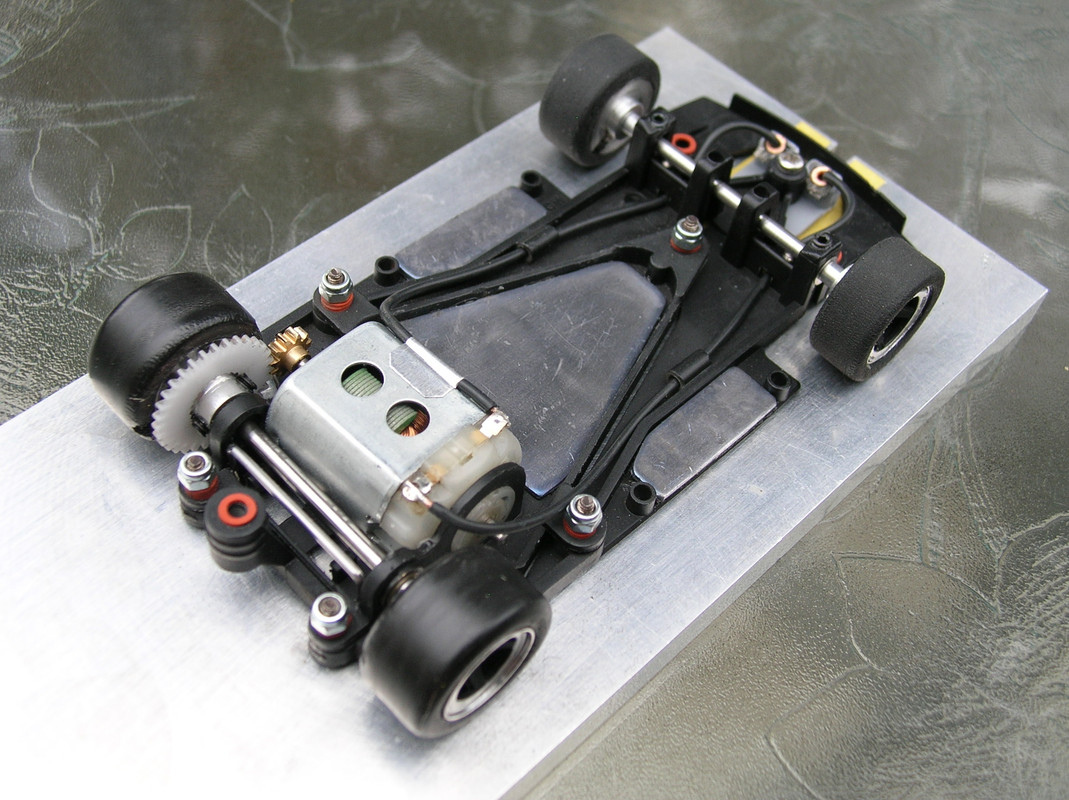
The second is a Sidewinder (although this is a bit of a misnomer as the Tslot pod has a 2 degree motor angle),...with a Piranha 21K motor, and basically the same remaining bits as the first.
To avoid multiple same liveries, I do like to paint something a bit different, and while this is a fantasy livery, I think it does look period correct. I dad make/add a few bits.
Cheers
Chris Walker

I've come across a BMW X5 'Raid' bodyshell, but it has no glass & I guess the front valance is part of the chassis, so I'm looking for a) front valance (or complete chassis) & b) front windscreen (and side windows if available)
Does anyone have an old broken car lying around?, I'll take the complete car if you want to dispose of it.
Any help will be appreciated, cheers.