Posts: 176
Threads: 10
Likes Received: 532 in 144 posts
Likes Given: 436
Joined: Apr 2020
Location South Sweden
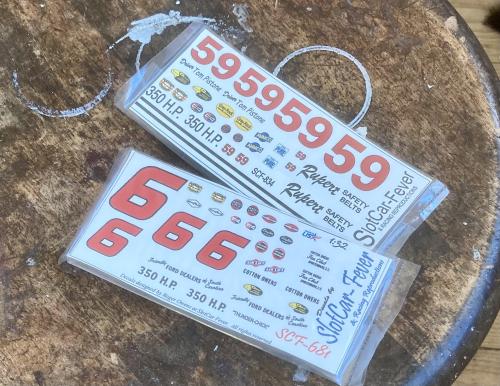
I have just received a couple of decals from Slot car fever. They have an impressive choice of Nascar decals, including older ones.
These are for 1959 Thunderbird cars, I have not found them anywhere else.
Sending for decals from the USA is rather complicated and expensive from here, so I don't want to spoil them.
Having heard somewhere that their decals are not that easy to apply, I wonder if there is anything I can do to improve them?
Like giving them a layer of Tamyia clear? Or anything else? Anyone out there who has used them?
Any advice would be much appreciated...
Cheers
Carver
(This post was last modified: 14th-Jul-22, 07:15 PM by
Carver.)
![[+]](https://slotracer.online/community/images/bootbb/collapse_collapsed.png) •
•
Posts: 539
Threads: 22
Likes Received: 829 in 380 posts
Likes Given: 348
Joined: Jun 2019
Decals can vary so much from one printer to another.
My techniques:
1. Use halfords car spray clear laquer as a thin coat over the decals a day before cutting them.
2. Cut as close to the edge as possible
3. Float in tepid water until the decal starts to separate from the back sheet then lift both out together, position the decal then slide the backsheet out.
4. Always buy TWO sets of decals because a first time perfect fit never happens and postage is normally the same whether you buy one set or two.
5. Leave for a day in a warm dry place before applying final laquer. Decals can trap water and that is a disaster if it's still there when final laquering is applied.
My fave decal supplier: KevinOZ from ebay
My least: Black Arrow factory kit decals. They always seem to fall apart in the water dip, especially the pinstripes.
Top tools:
- wooden toothpics for sliding the decals off the backsheet
- carpet knife blade for retrieving decals from the water dip. Even if the decal totally separates in the dip , a flat blade can retrieve it without the decal curling up on itself.
- cotton buds :
-- for adding water to the decal (after application to the body) to get a decal to slide if it starts to dry prematurely (before final positioning)
-- for drying the surface of the decal after final positioning.
- shaped (bent) nail scissors for the difficult to cut round edged decals
AlanW
(This post was last modified: 15th-Jul-22, 05:26 AM by
Nonfractal.)
Posts: 176
Threads: 10
Likes Received: 532 in 144 posts
Likes Given: 436
Joined: Apr 2020
Location South Sweden
Thanks, Alan, I can fill in most of the columns, but unfortunately not the two sets advice.
I will spray a coat of Tamyia ( no Halford in this neck of the woods) and apply only one decal a day...
Carver
Posts: 285
Threads: 53
Likes Received: 402 in 177 posts
Likes Given: 39
Joined: Apr 2019
-To protect the decals i sparay them before ude with a product used to protect pencil drawings,Fixativ brand.
- I have had enough of wrinkled decals so i lay 3 coats of floor polish (Klear or similar- i have a large bottle of it,dip the body in, then let dry) and i have never had a disaster since.
-I use Motip lacquer.I apply laquer 2-3 days after floor polish coating.
As for the rest i fully agree with Alan
Posts: 1,478
Threads: 223
Likes Received: 2,275 in 824 posts
Likes Given: 1,088
Joined: Mar 2019
Location Norfolk, England
Just scan the originals so you can print replacements if you muck them up.
(This post was last modified: 22nd-Jul-22, 12:18 PM by
CMOTD.)
Posts: 176
Threads: 10
Likes Received: 532 in 144 posts
Likes Given: 436
Joined: Apr 2020
Location South Sweden
Yes, I will!

•
Posts: 176
Threads: 10
Likes Received: 532 in 144 posts
Likes Given: 436
Joined: Apr 2020
Location South Sweden
It turned out I didn't have to worry. Nothing wrong with the Slot Car Fever decals!

Thanks for the help!
Carver



