7th-Apr-21, 12:52 PM
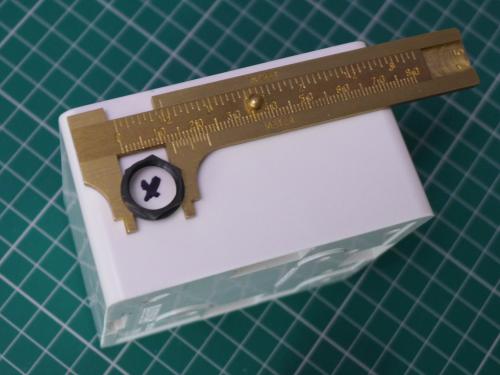
The first thing to do is to create a half inch diameter hole in the surface box to fit the panel-mounted fuseholder…

This is by far the most time-consuming (and tedious) part of the whole job. The boxes I use are made from melamine, which gives a lovely finish (and is also flame retardant) but really isn’t easy to drill or cut. Going in gung-ho with a big drill bit will turn your lovely box into a dozen or so pieces of shattered melamine.

The easiest way I have found to create the hole for the fuseholder is to use a small-ish 3mm drill bit on a multi-tool (eg a Dremel) to drill the first hole. Take your time and don’t press too hard. The hole can then be opened up with increasingly bigger drill bits – or by using a milling bit on the multitool – or by using a convex needle file by hand. If you use a drill rather than a multi tool, hold the box in a vice, use a very slow speed and don’t push – a hand drill is ideal.
As my milling bit seemed rather worn, I opened the hole up to 6.5mm with a drill bit and then used a needle file. The file does work well on the melamine and it only took me about 20 minutes of meditative whittling to have a reasonable round hole that the fuse holder fits into (including over the screw thread). I also had a work surface covered in dubious white powder... Melamine itself is not hazardous, but inhalation of any particles should be avoided – I worked with a cloth mask over my mouth and nose and then cleaned up the dust immediately after this picture…

So here is everything cleaned up and the holder test-fitted with the retaining ring. I will be removing it to 'tin' the contacts ready for soldering…

Of course, none of this was really necessary! A fuse holder (containing a quick-blow fuse) is absolutely necessary to protect your controller, power supply, cars and track. However, a simpler inline fuseholder could be fitted inside the box or in a separate box - or as part of the cable. I just like the ease of use of this arrangement - and it looks good.
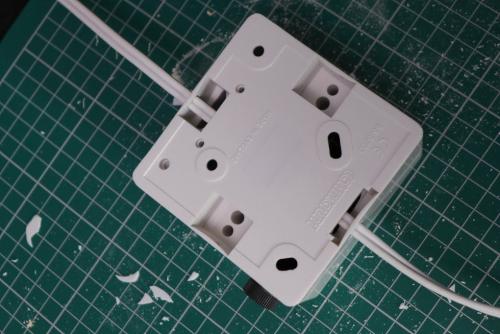
There is more melamine drilling that needs doing in this build... I will be fitting this box on a solid surface, so want the wires to the power supply and to the track to come out of the sides of the box. Normally, it is easier to have the cables coming out of the box where there are pre-made holes covered by an ultra-thin 'membrane' that can be broken very easily with a large-ish screwdriver.

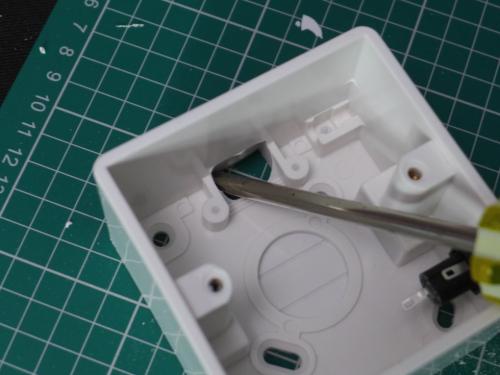
There are also two thinner areas in the walls of the box – front and back – to help with the extra holes I'll be making for the cable. I simply drilled two 3mm holes close together within each of these thin areas - and then used a combination of milling bit and needle file to create rectangular hole the speaker cable fits into snuggly. There are corresponding areas of 'melamine membrane' behind the thin-walled areas which create a path into the box interior. Again, they are removed with a screwdriver...

The box is now ready to have all the wiring fitting, which - thanks to the BSCRA diagrams - is a pretty straightforward task.
This is by far the most time-consuming (and tedious) part of the whole job. The boxes I use are made from melamine, which gives a lovely finish (and is also flame retardant) but really isn’t easy to drill or cut. Going in gung-ho with a big drill bit will turn your lovely box into a dozen or so pieces of shattered melamine.
The easiest way I have found to create the hole for the fuseholder is to use a small-ish 3mm drill bit on a multi-tool (eg a Dremel) to drill the first hole. Take your time and don’t press too hard. The hole can then be opened up with increasingly bigger drill bits – or by using a milling bit on the multitool – or by using a convex needle file by hand. If you use a drill rather than a multi tool, hold the box in a vice, use a very slow speed and don’t push – a hand drill is ideal.
As my milling bit seemed rather worn, I opened the hole up to 6.5mm with a drill bit and then used a needle file. The file does work well on the melamine and it only took me about 20 minutes of meditative whittling to have a reasonable round hole that the fuse holder fits into (including over the screw thread). I also had a work surface covered in dubious white powder... Melamine itself is not hazardous, but inhalation of any particles should be avoided – I worked with a cloth mask over my mouth and nose and then cleaned up the dust immediately after this picture…
So here is everything cleaned up and the holder test-fitted with the retaining ring. I will be removing it to 'tin' the contacts ready for soldering…
Of course, none of this was really necessary! A fuse holder (containing a quick-blow fuse) is absolutely necessary to protect your controller, power supply, cars and track. However, a simpler inline fuseholder could be fitted inside the box or in a separate box - or as part of the cable. I just like the ease of use of this arrangement - and it looks good.
There is more melamine drilling that needs doing in this build... I will be fitting this box on a solid surface, so want the wires to the power supply and to the track to come out of the sides of the box. Normally, it is easier to have the cables coming out of the box where there are pre-made holes covered by an ultra-thin 'membrane' that can be broken very easily with a large-ish screwdriver.
There are also two thinner areas in the walls of the box – front and back – to help with the extra holes I'll be making for the cable. I simply drilled two 3mm holes close together within each of these thin areas - and then used a combination of milling bit and needle file to create rectangular hole the speaker cable fits into snuggly. There are corresponding areas of 'melamine membrane' behind the thin-walled areas which create a path into the box interior. Again, they are removed with a screwdriver...
The box is now ready to have all the wiring fitting, which - thanks to the BSCRA diagrams - is a pretty straightforward task.

![[+]](https://slotracer.online/community/images/bootbb/collapse_collapsed.png)