

20th-Jun-23, 01:48 PM
For 3d printing one of the key abilities of any printer FDM or resin to produce good prints is the minimum layer thickness it can print.
To explain, below is a ball or sphere 50mm diameter drawn on CAD.
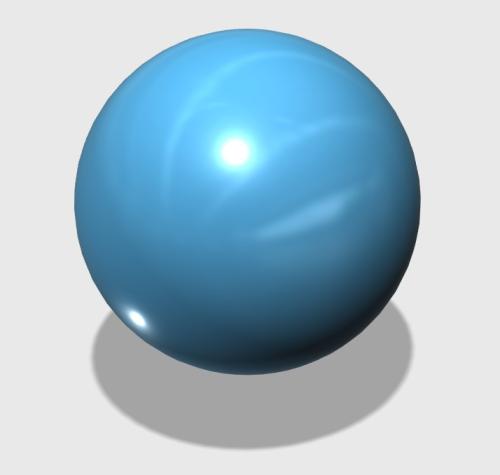
Take the CAD file to the printer ‘slicer’ software and it turns the sphere in to a collection of plates each plate is the layer thickness set.

This is at 0.5mm layer to show the concept of the overlapping plates forming the sphere and the steps are quite apparent. In practice this would require aggressive post print sanding to smooth out these steps.
Same file now at 0.1mm layer (usually the best most FDM printers can achieve and the steps are much finer but still there so will still need some sanding.)

Resin printers can offer much finer resolution i.e. 0.02mm and the steps at this setting are now indistinct in the overall curve.
The above is an introduction to the importance of the layer thickness if you wish to print body shells that don’t look like Lego plates stacked up.
Now for some real world testing on a FDM printer (Creality CR Mini). Taking the rear quarter of the Aston DBR1 that I sectioned for vertical printing, this part has curves in 3 planes so an ideal real world test piece as only 14 minutes to print at 0.24mm layer.
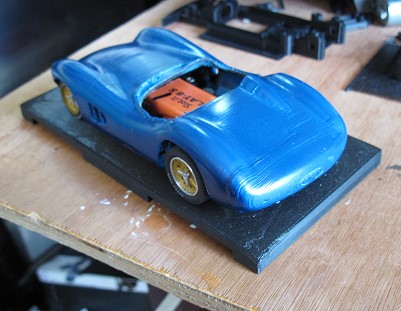
1st up 0.24mm layer
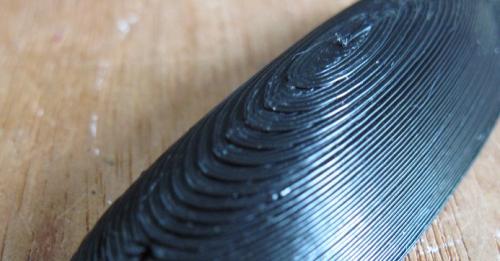
Steps clearly visible
0.12mm layer
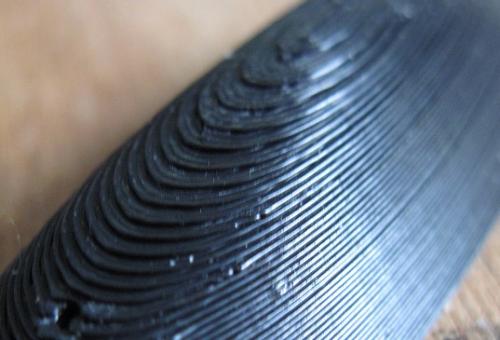
0.12mm is a common setting for fine printing.
0.1mm layer
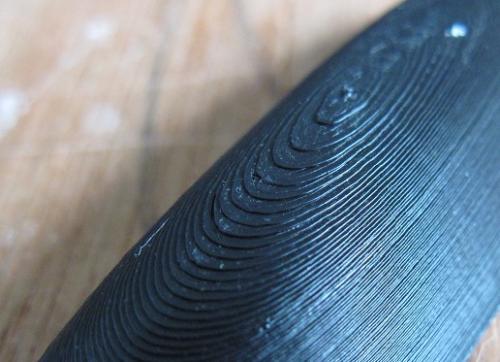
0.1mm is the stated limit of many FDM printers including the CR 10 Mini.
0.08mm layer
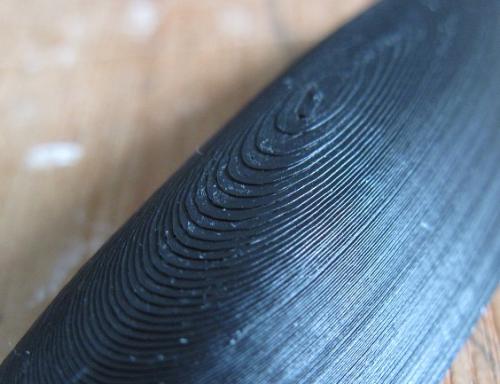
Most printers can go to 0.08mm which gives a good result, some can go down to a stated 0.05mm.
0.04mm layer
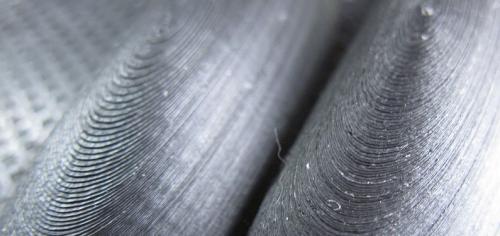
0.08 & 0.04mm, side by side
This shows the printer did achieve a better resolution than 0.08mm (and better than the stated minimum of 0.1mm) by how much I can’t measure but overall it does look better than 0.08mm layer height.
The 0.04mm setting was achieved using the standard 1.8 degree stepper motors that came with the CR10 Mini. I dialled this setting into Cura crossed fingers and watched as it printed. Why try down to 0.04mm?, this came from a comment attached to a recent printer review where the new printer has 0.9 degree stepper motors on all 3 axis including Z or layer control. In theory these stepper motors should be capable of finer and more consistent resolution than the 1.8 motors. In the comments below the review, one of the comments stated that 0.04mm can be achieved using the 1.8 degree stepper motors in older printers.
As stated all printed on a Creality CR10 Mini converted to direct metal filament drive, some frame stiffening but otherwise as it came from Creality.
Settings
Material PLA (Esun ePLA-ST)
Nozzle 200C
Bed 60C
Outer wall speed 40mm/s
Overall speed 80mm/s
100% infill.
The 0.04mm setting is interesting but the flip side is a 24 hour print time instead of 10 hours to do the Aston DBR1 complete, so for myself more practical for printing smaller objects i.e. drivers or engine detail.
Cheers
John
To explain, below is a ball or sphere 50mm diameter drawn on CAD.
Take the CAD file to the printer ‘slicer’ software and it turns the sphere in to a collection of plates each plate is the layer thickness set.
This is at 0.5mm layer to show the concept of the overlapping plates forming the sphere and the steps are quite apparent. In practice this would require aggressive post print sanding to smooth out these steps.
Same file now at 0.1mm layer (usually the best most FDM printers can achieve and the steps are much finer but still there so will still need some sanding.)
Resin printers can offer much finer resolution i.e. 0.02mm and the steps at this setting are now indistinct in the overall curve.
The above is an introduction to the importance of the layer thickness if you wish to print body shells that don’t look like Lego plates stacked up.
Now for some real world testing on a FDM printer (Creality CR Mini). Taking the rear quarter of the Aston DBR1 that I sectioned for vertical printing, this part has curves in 3 planes so an ideal real world test piece as only 14 minutes to print at 0.24mm layer.
1st up 0.24mm layer
Steps clearly visible
0.12mm layer
0.12mm is a common setting for fine printing.
0.1mm layer
0.1mm is the stated limit of many FDM printers including the CR 10 Mini.
0.08mm layer
Most printers can go to 0.08mm which gives a good result, some can go down to a stated 0.05mm.
0.04mm layer
0.08 & 0.04mm, side by side
This shows the printer did achieve a better resolution than 0.08mm (and better than the stated minimum of 0.1mm) by how much I can’t measure but overall it does look better than 0.08mm layer height.
The 0.04mm setting was achieved using the standard 1.8 degree stepper motors that came with the CR10 Mini. I dialled this setting into Cura crossed fingers and watched as it printed. Why try down to 0.04mm?, this came from a comment attached to a recent printer review where the new printer has 0.9 degree stepper motors on all 3 axis including Z or layer control. In theory these stepper motors should be capable of finer and more consistent resolution than the 1.8 motors. In the comments below the review, one of the comments stated that 0.04mm can be achieved using the 1.8 degree stepper motors in older printers.
As stated all printed on a Creality CR10 Mini converted to direct metal filament drive, some frame stiffening but otherwise as it came from Creality.
Settings
Material PLA (Esun ePLA-ST)
Nozzle 200C
Bed 60C
Outer wall speed 40mm/s
Overall speed 80mm/s
100% infill.
The 0.04mm setting is interesting but the flip side is a 24 hour print time instead of 10 hours to do the Aston DBR1 complete, so for myself more practical for printing smaller objects i.e. drivers or engine detail.
Cheers
John
Mr Fit for Function.
![[+]](https://slotracer.online/community/images/bootbb/collapse_collapsed.png)


