

7th-Apr-21, 08:08 AM
There's not a huge amount to show... but progress continues! Quite a lot of the benchwork has been fixed - apart the removable lower loop, which will be the final piece in the jigsaw, maybe not until some of the scenics have been started.
A lot of work and tweaking has gone into the hairpin at the bottom of the hill. The character has changed quite a bit...
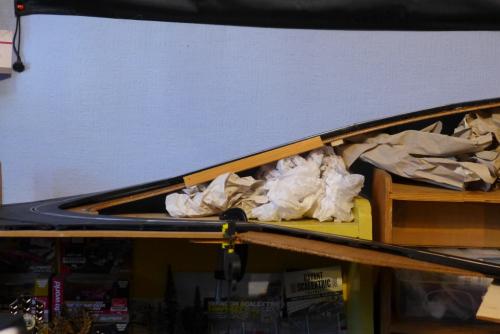
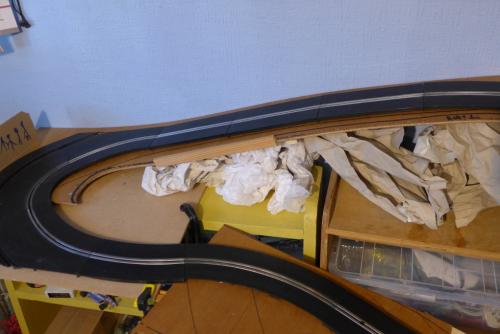
The adverse camber is still there, but the slope down in the middle of the corner is less severe. The kick-up from the hairpin is steeper (about 12 cms in 36 cms - or 1:3) and the drop from the exit of the corner to the pit lane 'Y' of the lower loop is more pronounced (10cms in 70 cms - or 1:7), which is the same as the middle section of the hill. The slope from the bridge to the start of the hill (ie the corner past the hillside village) is a gentler 1:20.
Those changes do give a different feel to the hairpin. It's still a challenge, but the initial gradient up the hill makes the climb much more satisfying than it was, even if the drop down within the corner isn't quite so spectacular. I have left a 1 1/2 inch screw in the inside of the corner that can be tightened or loosened to change the characteristic of the drop, until I get it just right.
After viewing more videos of Sanremo, Monte Carlo, Corsica and Antibes, I've cut the roadbed of the hill much tighter to the single-lane track. In terms of driving - it looks quite exhilarating! It also allows for a steep hillside remaining within the limits of the bookcases under the track - and the potential of carrying that hillside down onto the lower loop board, giving continuity in the scenics. Looking at videos of the 80s and early 90s, I have three scenic / protective items to put between the track and the precipice. The first is relatively short pieces of armco...
More substantial blocks of stone wall...
And the black & white wooden stakes / bollards that can be linked with metal rails (brass tube or piano wire in 1/32 scale)...
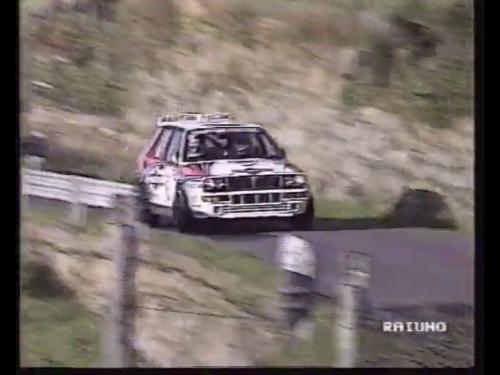
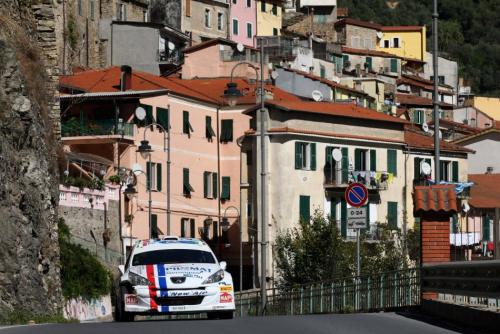
I'm thinking of using all three - but not overdoing it. The main area cars are dropping over the edge is at the top (the village). I'm still looking at something inspired by this photo, but using more 80s-90s materials, probably the low wall...
I have been looking at figures - spectators are an important feature of the rallies in this region... The events are mostly in the late autumn and winter - so that gives plenty of options. I have some of the fabulous R&R figures (here) and - on Brian's recommendation - picked up 50 Chinese figures for £9.50 (here). Where there are walls and earth banks, it's common for spectators to be sitting down, so I'm also looking at the set of 15 unpainted Preiser figures (here) for my more detailed village scene.
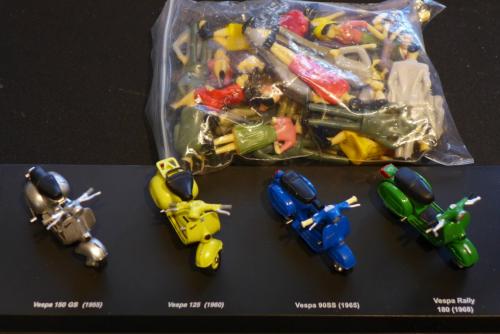
What I did pick up - as well as the bag of Chinese figures - was a box of these 1/32 scale Vespas for a tenner. That was less than the price of one sold individually because the collectors' box was damaged. I shalln't be needing the box....
I shall crack on with getting the hill right, finishing the benchwork and wiring together the track pieces before I start gluing track sections down with silicone sealant. The hill is the important bit to do first. I'll also keep half an eye on the next step - building up the road surface and the daunting task of starting the scenics. I shall be working on one smallish section at a time. The hill and the hairpin will be my focus over the next few weeks.
A lot of work and tweaking has gone into the hairpin at the bottom of the hill. The character has changed quite a bit...
The adverse camber is still there, but the slope down in the middle of the corner is less severe. The kick-up from the hairpin is steeper (about 12 cms in 36 cms - or 1:3) and the drop from the exit of the corner to the pit lane 'Y' of the lower loop is more pronounced (10cms in 70 cms - or 1:7), which is the same as the middle section of the hill. The slope from the bridge to the start of the hill (ie the corner past the hillside village) is a gentler 1:20.
Those changes do give a different feel to the hairpin. It's still a challenge, but the initial gradient up the hill makes the climb much more satisfying than it was, even if the drop down within the corner isn't quite so spectacular. I have left a 1 1/2 inch screw in the inside of the corner that can be tightened or loosened to change the characteristic of the drop, until I get it just right.
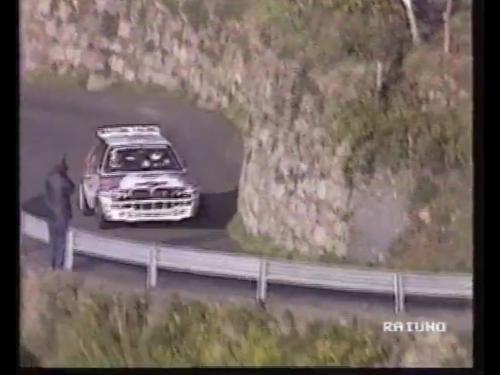
After viewing more videos of Sanremo, Monte Carlo, Corsica and Antibes, I've cut the roadbed of the hill much tighter to the single-lane track. In terms of driving - it looks quite exhilarating! It also allows for a steep hillside remaining within the limits of the bookcases under the track - and the potential of carrying that hillside down onto the lower loop board, giving continuity in the scenics. Looking at videos of the 80s and early 90s, I have three scenic / protective items to put between the track and the precipice. The first is relatively short pieces of armco...
More substantial blocks of stone wall...
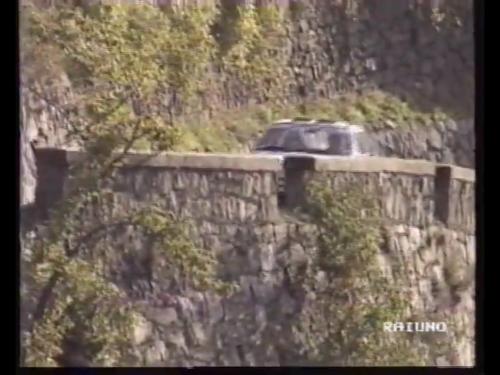
And the black & white wooden stakes / bollards that can be linked with metal rails (brass tube or piano wire in 1/32 scale)...
I'm thinking of using all three - but not overdoing it. The main area cars are dropping over the edge is at the top (the village). I'm still looking at something inspired by this photo, but using more 80s-90s materials, probably the low wall...
I have been looking at figures - spectators are an important feature of the rallies in this region... The events are mostly in the late autumn and winter - so that gives plenty of options. I have some of the fabulous R&R figures (here) and - on Brian's recommendation - picked up 50 Chinese figures for £9.50 (here). Where there are walls and earth banks, it's common for spectators to be sitting down, so I'm also looking at the set of 15 unpainted Preiser figures (here) for my more detailed village scene.
What I did pick up - as well as the bag of Chinese figures - was a box of these 1/32 scale Vespas for a tenner. That was less than the price of one sold individually because the collectors' box was damaged. I shalln't be needing the box....
I shall crack on with getting the hill right, finishing the benchwork and wiring together the track pieces before I start gluing track sections down with silicone sealant. The hill is the important bit to do first. I'll also keep half an eye on the next step - building up the road surface and the daunting task of starting the scenics. I shall be working on one smallish section at a time. The hill and the hairpin will be my focus over the next few weeks.
![[+]](https://slotracer.online/community/images/bootbb/collapse_collapsed.png)