

31st-Mar-21, 05:08 PM
I am safely in my comfort zone at the moment - wiring, electronics and benchwork 
My plan for this week was to continue testing the track as it is, with all the wiring for the automatic polarity changes complete...
To help with that, I soldered wires to the second dead strip on the upper loop and hooked that up to an Arduino Uno clone so I can use Race Coordinator to time the runs (see here for how I did it). I have commandeered a drawer just below the dead strip to house the electronics...
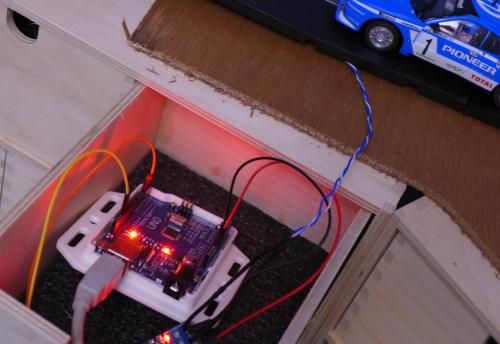
And it is all working very nicely...
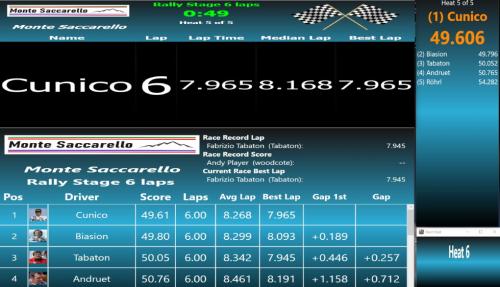
Times for the run down and up the hill (a 'lap') are now just under 8 seconds, plummeting from the original 10 seconds when I was using the manual DPDT switch and from just over 9 when I had the relay board with an automatic sensor at the top and manual button for the bottom loop. I can now concentrate fully on driving - and having very little run-off does force me to keep things neat. Those fast times are with a race-prepared Ninco Lancia 037, which is very well suited to the layout.
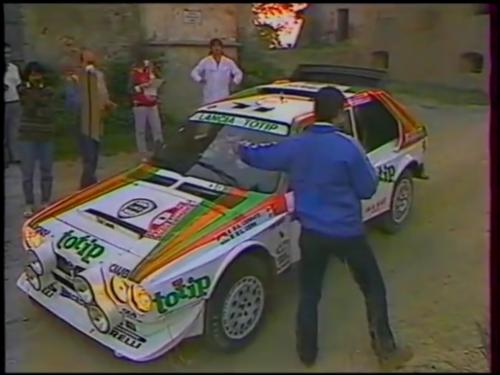
In terms of more wiring, I will add start lights operated by the Arduino to sit next to the start line. I have a little 5-segment LED bar on its way from China - plus a tiny 34 x 16 x 24mm black plastic enclosure which will be to scale, if not entirely in keeping with the 70s, 80s & 90s theme. A start line / time control scene replaces the planned service area on the diagram in the opening post - less is more, I think. I have been researching on YouTube what 1980s start line personnel would wear and I quite like this scene...
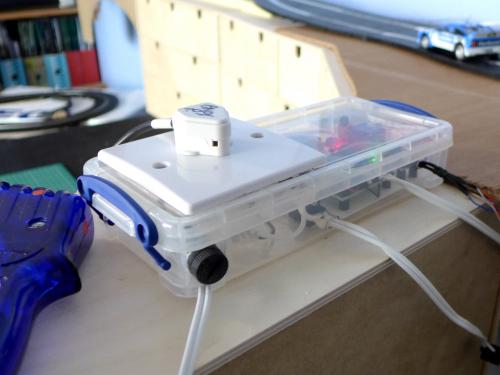
If I'm going to run the stage competitively - most likely as part of a proxy - I will need a power relay so Race Coordinator can control the power at the start and my reaction time is taken out of the equation. That'll be another relay to squeeze into the controller box...
As I complete the benchwork, I will be soldering jumper wires between every track piece. The connections between single-lane track pieces are not as secure as normal. As I'll be gluing the track down (with silicone sealant) and the scenics will involve embedding the plastic track in the scenery, the conductivity of the entire layout has to be 100% bullet-proof before that happens.
What I'm doing this week is to test the track and tweak the gradients and transitions between the different boards that are acting as the road bed. The benchwork is non-traditional, more of a play on an open-grid bench, but using furniture - plus battens on the walls - as supports. And the removable lower loop will be a single board sitting on home-made trestles. I need a couple of 4x2 sheets of ply before the weekend... the woodcote woodstore was a bit short.
The stage is great fun to drive. What I really like from driving lots of laps is that nothing is level - it's just non-stop elevations, jumps, dips and cambers. I put some foam under the straight between bridge and 'Y' of the upper loop and it gives the impression of a jump. It's the only full-throttle moment on the track and although the cars aren't quite getting airborne, it looks like it. I was worried the Radius 4 'esses' on the hill wouldn't add anything, but I'm glad I didn't go with anything tighter. They look right and are tricky with the narrow single-lane width - quite how tricky will depend on how I build up the extra road surface. And making them the wider & faster R4s adds to the fun of the hairpin...
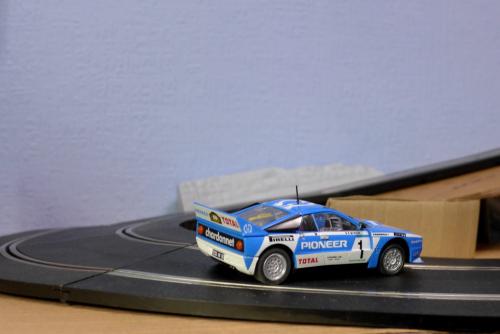
The hairpin at the bottom of the hill (you can't quite see it in the video) looks great and is a challenge to drive perfectly - in either direction. I will leave the full width of the R1 (removing the rails from the outer lane and filling the slot) so the cars can really swing out. The camber and the drop down is fabulous visually. The rally cars I've tested have all managed it fine - although a few ultra-low and long-wheelbase GT and BTCC race cars are marginal... it is about the technique just to get them round the corner.
I will continue with the testing and - hopefully - get started on finalising and fixing the benchwork at the weekend. I also need to decide on the width of the road bed down the hill and the angle of the hillside below the road...
My plan for this week was to continue testing the track as it is, with all the wiring for the automatic polarity changes complete...
To help with that, I soldered wires to the second dead strip on the upper loop and hooked that up to an Arduino Uno clone so I can use Race Coordinator to time the runs (see here for how I did it). I have commandeered a drawer just below the dead strip to house the electronics...
And it is all working very nicely...
Times for the run down and up the hill (a 'lap') are now just under 8 seconds, plummeting from the original 10 seconds when I was using the manual DPDT switch and from just over 9 when I had the relay board with an automatic sensor at the top and manual button for the bottom loop. I can now concentrate fully on driving - and having very little run-off does force me to keep things neat. Those fast times are with a race-prepared Ninco Lancia 037, which is very well suited to the layout.
In terms of more wiring, I will add start lights operated by the Arduino to sit next to the start line. I have a little 5-segment LED bar on its way from China - plus a tiny 34 x 16 x 24mm black plastic enclosure which will be to scale, if not entirely in keeping with the 70s, 80s & 90s theme. A start line / time control scene replaces the planned service area on the diagram in the opening post - less is more, I think. I have been researching on YouTube what 1980s start line personnel would wear and I quite like this scene...
If I'm going to run the stage competitively - most likely as part of a proxy - I will need a power relay so Race Coordinator can control the power at the start and my reaction time is taken out of the equation. That'll be another relay to squeeze into the controller box...
As I complete the benchwork, I will be soldering jumper wires between every track piece. The connections between single-lane track pieces are not as secure as normal. As I'll be gluing the track down (with silicone sealant) and the scenics will involve embedding the plastic track in the scenery, the conductivity of the entire layout has to be 100% bullet-proof before that happens.
What I'm doing this week is to test the track and tweak the gradients and transitions between the different boards that are acting as the road bed. The benchwork is non-traditional, more of a play on an open-grid bench, but using furniture - plus battens on the walls - as supports. And the removable lower loop will be a single board sitting on home-made trestles. I need a couple of 4x2 sheets of ply before the weekend... the woodcote woodstore was a bit short.
The stage is great fun to drive. What I really like from driving lots of laps is that nothing is level - it's just non-stop elevations, jumps, dips and cambers. I put some foam under the straight between bridge and 'Y' of the upper loop and it gives the impression of a jump. It's the only full-throttle moment on the track and although the cars aren't quite getting airborne, it looks like it. I was worried the Radius 4 'esses' on the hill wouldn't add anything, but I'm glad I didn't go with anything tighter. They look right and are tricky with the narrow single-lane width - quite how tricky will depend on how I build up the extra road surface. And making them the wider & faster R4s adds to the fun of the hairpin...
The hairpin at the bottom of the hill (you can't quite see it in the video) looks great and is a challenge to drive perfectly - in either direction. I will leave the full width of the R1 (removing the rails from the outer lane and filling the slot) so the cars can really swing out. The camber and the drop down is fabulous visually. The rally cars I've tested have all managed it fine - although a few ultra-low and long-wheelbase GT and BTCC race cars are marginal... it is about the technique just to get them round the corner.
I will continue with the testing and - hopefully - get started on finalising and fixing the benchwork at the weekend. I also need to decide on the width of the road bed down the hill and the angle of the hillside below the road...
![[+]](https://slotracer.online/community/images/bootbb/collapse_collapsed.png)